
This article will introduce you into how to create page types. This is one of the most essential parts of setting up a web site.
The core installation of Kaliko CMS comes out of the box without any page types at all. The reason for this is to allow the developer to decide on and setup those page types necessary for the web site he/she is building. It's incredibly easy.
If you haven't already, go through the article on how to install Kaliko CMS first.
Creating a page type
First of all we'll create a folder called PageTypes in the root of our project. This isn't mandatory but helps keep the project structure neat and tidy.
We then proceed by creating a new class in that folder. As a first example we'll create a page type that we'll use for all articles and standard text pages throughout or web site. We'll call it ArticlePageType and set it to inherit CmsPage.
We also add a PageType attribute to it in order to mark it as a page type in the system. In this attribute we can define a few parameters such as name, display name (what is shown in the editor) and a template path (we leave it blank for now).
Please note that once a page type is created the name parameter of the PageType attribute should never be changed. This name is used internally to identify the page type.
To find the proper classes add the both paths KalikoCMS.Core and KalikoCMS.Attributes.
This is how our class will look like:
using KalikoCMS.Attributes;
using KalikoCMS.Core;

namespace CmsDemo.PageTypes {
    [PageType("ArticlePage", "Article page", "TODO")]
    public class ArticlePageType : CmsPage {
    }
}
We've now created our first page type, but it won't do much without any properties, so we will go ahead with adding some. We've by default gotten a few such as page name, publishing dates, whether the page should appear in menus or not. But we'll need to add those that are unique to our page type.
Adding properties
For our articles we'll need a heading (we could use the PageName property for that, but we might want to have a shorter page name and a longer heading so we'll keep these two apart), a preamble, an image and the main content.
You add each property to the page type by adding a virtual public property to the class and decorate that class with a Property attribute (or a derrivate of it).
The type of the property should be one of the standard provided ones or a custom developed one that inherits from PropertyData.
The name set in the Property attribute is the name that will be displayed in the editor while the actual name of the property is what will be used to access the properties' data from the page.
Let's add the four properties:
using KalikoCMS.Attributes;
using KalikoCMS.Core;
using KalikoCMS.PropertyType;

namespace CmsDemo.PageTypes {
    [PageType("Article", "Article page", "TODO")]
    public class ArticlePageType : CmsPage {
        [Property("Article heading")]
        public virtual StringProperty Heading { get; set; }

        [ImageProperty("Top image", Width = 960, Height = 280)]
        public virtual ImageProperty TopImage { get; set; }

        [Property("Preamble")]
        public virtual TextProperty Preamble { get; set; }

        [Property("Main body")]
        public virtual HtmlProperty MainBody { get; set; }
    }
}
You might have noticed that our ImageProperty is using a different attribute? Some property types have their own attributes in order to add meta data to the property. In the case of the ImageProperty attribute it is able to add a target width or height of the image. This will scale the selected image to fit the defined area. You can set either height, width or both.
Create a page of our new page type
We now got our first page type, we will most likely add a few more. Like a start page, maybe a contact page, news page or anything like that. To do so, just repeat the steps above.
Although we haven't yet create how the article pages will look we can create pages of that type in the administration interface.
In order to do this launch your project in a web browser of your choice. Once loaded navigate towards /Admin/. If the folder is protected you will get a login screen first. If so, fill it out with your admin account details and continue.
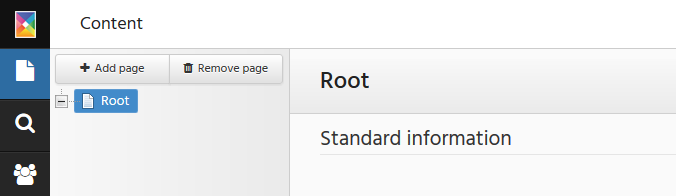
The admin interface will go into page mode directly. Listing the complete site content in a tree to the left. For a new project you'll only have a root page in it.
Select the root by clicking on it and then add a new page under the root by clicking on the Add page button above.
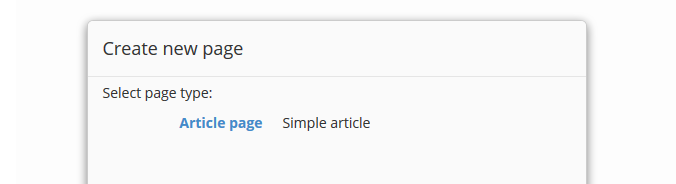
Depending on how many page types you've added the list that appears may look different. But you should at least have the article page type we just created. Select the page type you want and continue.
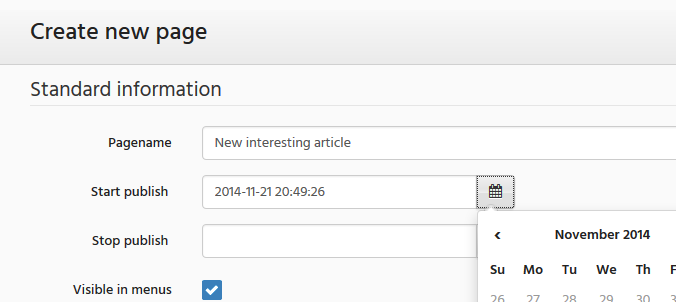
Once the page type is selected you will get a new instance of the page with all it's base properties as well as the properties you've added. Go ahead and give it some proper data. The page name you'll give it will decide the URL segment. For instance "My interesting article" below will render and URL looking like "my-interesting-article".
If you want the properties to appear in a different order, go ahead and move them in your page type class into whatever order you prefer. It will be mirrored in the editor once compiled.
Set the new page as start page
Every website needs to have a start page, the page that will be displayed when the user browse to the root of your site. This is defined in the web.config where you set the attribute startPageId. To get the id to enter go to the page that you wish to act as start page in the admin interface. You'll find the field Page Id under all the page properties if you scroll down the page completely. The id is in the form of a Guid ("00000000-0000-0000-0000-000000000000"). Copy this id and paste it into the startPageId attribute in siteSettings in your web.config:
<siteSettings startPageId="12345678-1234-1234-1234-123456789abc" ... />
If you launch your website the system will try to display your page, but you will however get a server error since we haven't create a template for our page type. So let's add one.
Create a template for our page type
What we have created is the abstract data-carrying part of the page. We'll also need to implement the visual representation of the page.
If you plan to develop your web site using WebForms you'll find an article on how to implement with WebForms here.
If you instead plan to develop with ASP.NET MVC, you'll find and article on how to implement with MVC here.