May 10, 2013
Hats off to the guys over at Esoteric Software. Not only did they live up to the Kickstarter promise to deliver generic AS3 runtime for their excellent 2d animation tool Spine, they also added a Starling version as a bonus! This post shows how to get going using Spine animation in your AS3/Starling project.
Updated 2015-03-22 Since this post was originally written the Spine runtime has undergone a bit of refactoring. To reflect the changes the post was updated using the latest runtime for Spine as well as the latest Starling library (1.6 at time of writing).
Spine is currently the most promising solution for 2d skeleton animation, featuring a lot of powerful features such as individual keyframing, skinning and more. The major advantages over traditional sprite sheets are that using skeletal animation uses far less memory and provides smoother animations and the ability to seamlessly shift from one animation to the next - something that makes your animations more vivid. Spine is currently offered for $60 and is definitely worth every cent of it. If you want to give it a try there's a export-disabled trial version for download. There are a couple of alternatives to Spine, but nothing comes close to its functionality. It's currently the most powerful 2d skeletal animation tool.
Currently Spine does not have a texture packer built-in, so we will be using TexturePacker developed by Andreas Löw. It's a great tool that recently got even better with a content protection feature. If you haven't already you should definitely check it out!
Currently Spine does not have a texture packer built-in, so we will be using TexturePacker developed by Andreas Löw. It's a great tool that recently got even better with a content protection feature. If you haven't already you should definitely check it out!
Setup the project
Setup a new AS3 project inside FlashDevelop (or the IDE of your choice) and check under project properties so that it compiles for the latest Flash player version. (Or you can download the project here.)Download the latest version of Starling and place starling.swc in the lib-folder of your project. Right click on the file and select Add To Library.

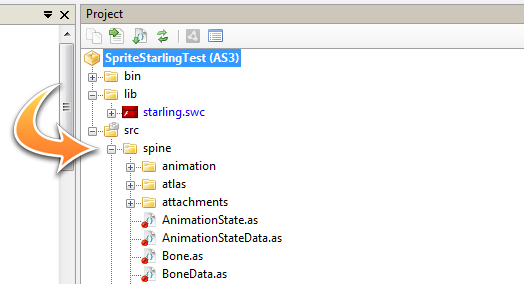
Download the latest Spine runtimes and copy the content of both spine-as3/src and spine-starling/src into your src folder:
We've now created our project. Lets get some data into it and then return to do some coding.
Export data from Spine
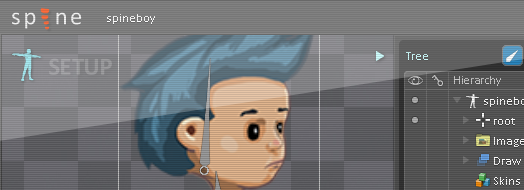
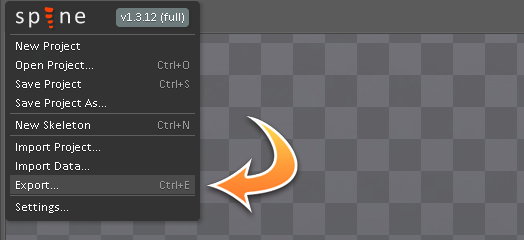
Lets start by preparing the data. Once you've created your animations you need to get them out of Spine and into your project. This is done using the Export function.
Be sure to use JSON as the data format and set the output path to src in your AS3 project:

Create the sprite sheet using TexturePacker
Okay, so now we got the animation data, but we'll also need the body part graphics as a texture atlas. This is where TexturePacker comes in to do the job.
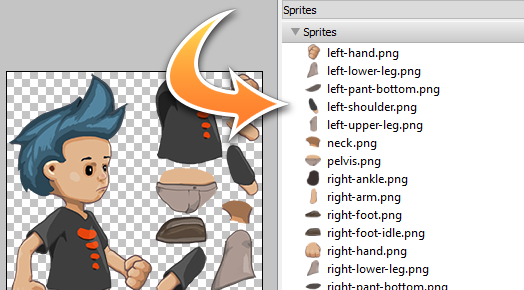
Start TexturePacker, select all the images from your Spine project (we're using the Spineboy sample project for this demo)..
Start TexturePacker, select all the images from your Spine project (we're using the Spineboy sample project for this demo)..

.. drag and drop them into the Sprites panel of TexturePacker (you could also use the "Add Sprites" option inside of TexturePacker):
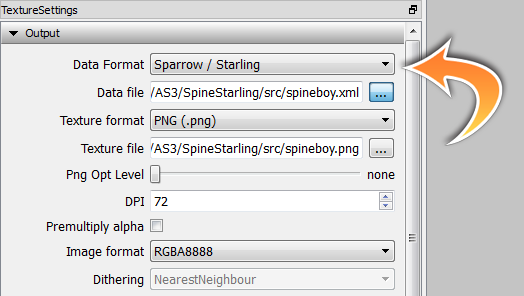
In the TextureSettings panel, select "Sparrow / Starling" as Data Format and place both the Data file and Texture file in the src-path of your AS3 project:
Lets write some code!
Lets start by adding Starling into our Main class:package {Next step is to add the MyStarlingApp class that we used as a constructor argument for Starling. Create a new class named MyStarlingApp and make it inherit from starling.display.Sprite.
import flash.display.Sprite;
import flash.events.Event;
import starling.core.Starling;
public class Main extends Sprite {
private var _starling:Starling;
public function Main():void {
if (stage)
init();
else
addEventListener(Event.ADDED_TO_STAGE, init);
}
private function init(e:Event = null):void {
removeEventListener(Event.ADDED_TO_STAGE, init);
_starling = new Starling(MyStarlingApp, stage);
_starling.start();
}
}
}
Embed the data files using [Embed(source="..",mimeType="application/octet-stream")] inside the class.
Here's the complete code, I'll return to some of the more specific parts:
package {All animations are referred to by the name given in Spine. For the Spineboy demo project there's two animations: "walk" and "jump".
import flash.utils.setTimeout;
import spine.animation.AnimationStateData;
import spine.starling.SkeletonAnimation;
import spine.starling.StarlingAtlasAttachmentLoader;
import spine.SkeletonData;
import spine.SkeletonJson;
import starling.core.Starling;
import starling.display.Sprite;
import starling.textures.Texture;
import starling.textures.TextureAtlas;
public class MyStarlingApp extends Sprite {
[Embed(source="spineboy.xml",mimeType="application/octet-stream")]
static public const SpineBoyAtlasXml:Class;
[Embed(source="spineboy.png")]
static public const SpineBoyAtlasTexture:Class;
[Embed(source="spineboy.json",mimeType="application/octet-stream")]
static public const SpineBoyJson:Class;
private var _skeleton:SkeletonAnimation;
public function MyStarlingApp() {
var texture:Texture = Texture.fromBitmap(new SpineBoyAtlasTexture());
var xml:XML = XML(new SpineBoyAtlasXml());
var atlas:TextureAtlas = new TextureAtlas(texture, xml);
var attachmentLoader:StarlingAtlasAttachmentLoader = new StarlingAtlasAttachmentLoader(atlas);
var json:SkeletonJson = new SkeletonJson(attachmentLoader);
var skeletonData:SkeletonData = json.readSkeletonData(new SpineBoyJson());
var stateData:AnimationStateData = new AnimationStateData(skeletonData);
// Setup how to morph between different animation sets
stateData.setMixByName("walk", "jump", 0.3);
stateData.setMixByName("jump", "walk", 0.4);
stateData.setMixByName("jump", "jump", 0.2);
_skeleton = new SkeletonAnimation(skeletonData, false, stateData);
_skeleton.x = 400;
_skeleton.y = 460;
_skeleton.state.setAnimationByName(0, "walk", true);
setTimeout(makeJump, 3000);
addChild(_skeleton);
Starling.juggler.add(_skeleton);
}
private function makeJump():void {
_skeleton.state.setAnimationByName(0, "jump", false);
_skeleton.state.addAnimationByName(0, "walk", true, 2); // delay next animation by 2 seconds
}
}
}
One of the powerful features of Spine is the smooth transitions between animations. This is made by defining "mixes" on the AnimationStateData object using the setMixByName function. The first parameter is the name of the animation that the transition will be made from, the second the animation that will be switched to and the third parameter is the transition time. In the code above the transition between "walk" and "jump" is set to 0.3 seconds. If no mixes have been defined the change in animation will occur instantly. To make the animations smoother you should set up mixes for all animation changes that can occur.
To start an animation call the setAnimationByName function of the SkeletonAnimation object's state property. The first parameter is track, the second is the name of the animation and the third is if the animation should be looped.
If you wish to play one animation and immediately after another, use addAnimationByName after setAnimationByName in order to stack animations that will be played after each other.
The runtimes are undergoing continues updates, so the one used in the archive above may differ from the one available at http://esotericsoftware.com/spine-runtimes/.