This post will show how to switch implementation to the ASP.NET Identity provider for Telerik Data Access usage for the default ASP.NET web project template.
ASP.NET Identity is a nice solution for authentication. But if you're thinking of using it together with another database than SQL Server it can be pretty troublesome. Wouldn't it be great to have an ASP.NET Identity provider that would be pretty database independent? Well, by utilising Telerik's great ORM Data Access ASP.NET Identity provider for Telerik Data Access supports all databases that are supported by Telerik Data Access. This post will show how to convert the default web project template to use AspNet.Identity.DataAccess.
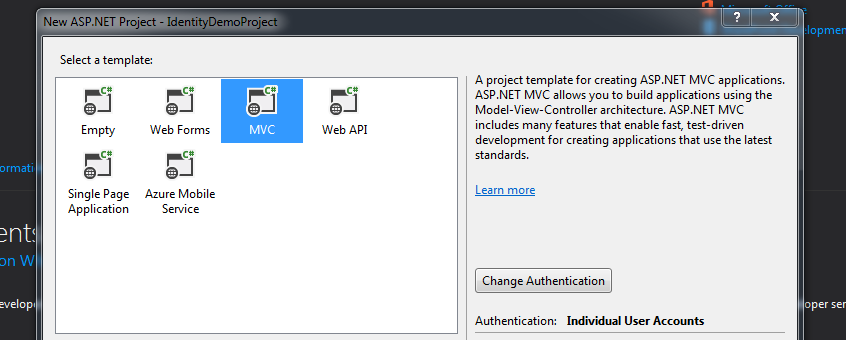
Create a new ASP.NET Web Application project using .NET Framework 4.5 (or later) and select either MVC or Web Forms depending on your preferences (I'll use MVC in this sample) and ensure that authentication is included for Individual User Accounts.
You're new project contains the Entity Framework implementation of ASP.NET Identity. Let's start by removing all of these references.
Remove the following NuGet packages: Microsoft.AspNet.Identity.EntityFramework and EntityFramework.

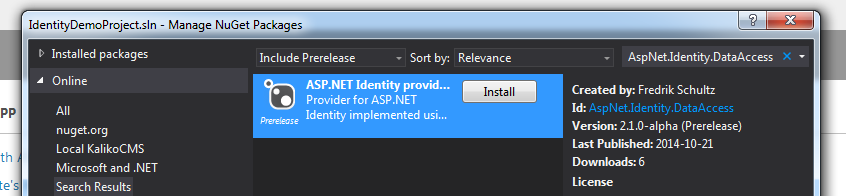
Let's continue by adding the provider we're going to use from NuGet named AspNet.Identity.DataAccess. Be sure to select "Include Prerelease" since the current version is in pre-release stage (edit: a stable release has been made). This will also add the referenced package for Telerik.DataAccess.Core.
If we try to compile the project now we'll get a lot of errors. This is because the code that was generated still try to implement against Entity Framework.
Delete the file IdentityModel.cs found under Models since we won't be needing it.
Open IdentityConfig.cs under the App_Start folder and remove the following two references: System.Data.Entity and Microsoft.AspNet.Identity.EntityFramework. Instead add a reference to AspNet.Identity.DataAccess.
Replace all ApplicationUser in the file to IdentityUser.
Since AspNet.Identity.DataAccess uses Guids instead of strings for identifiers (something that ASP.NET Identity 2 supports but still assumes strings by default) we need to define this in all type references, like for UserManager<>.
Change all <IdentityUser> to <IdentityUser, Guid> and change SignInManager<IdentityUser, string> into SignInManager<IdentityUser, Guid>.
Remove the context parameter from the creation of the UserStore as well as the type:
var manager = new IdentityUserManager(new UserStore<IdentityUser, Guid>(context.Get<ApplicationDbContext>()));
The AspNet.Identity.DataAccess implementation of UserStore (as well as RoleStore) can also be passed a context, but for this example we'll use the automatically created context.
You're code should now be looking like this:
using System;
using System.Security.Claims;
using System.Threading.Tasks;
using Microsoft.AspNet.Identity;
using Microsoft.AspNet.Identity.Owin;
using Microsoft.Owin;
using Microsoft.Owin.Security;
using AspNet.Identity.DataAccess;

namespace IdentityDemoProject {
    public class EmailService : IIdentityMessageService {
        public Task SendAsync(IdentityMessage message) {
            // Plug in your email service here to send an email.
            return Task.FromResult(0);
        }
    }

    public class SmsService : IIdentityMessageService {
        public Task SendAsync(IdentityMessage message) {
            // Plug in your SMS service here to send a text message.
            return Task.FromResult(0);
        }
    }

    // Configure the application user manager used in this application. UserManager is defined in ASP.NET Identity and is used by the application.
    public class ApplicationUserManager : UserManager<IdentityUser, Guid> {
        public ApplicationUserManager(IUserStore<IdentityUser, Guid> store)
            : base(store) {}

        public static ApplicationUserManager Create(IdentityFactoryOptions<ApplicationUserManager> options, IOwinContext context) {
            var manager = new ApplicationUserManager(new UserStore());
            // Configure validation logic for usernames
            manager.UserValidator = new UserValidator<IdentityUser, Guid>(manager) {
                AllowOnlyAlphanumericUserNames = false,
                RequireUniqueEmail = true
            };

            // Configure validation logic for passwords
            manager.PasswordValidator = new PasswordValidator {
                RequiredLength = 6,
                RequireNonLetterOrDigit = true,
                RequireDigit = true,
                RequireLowercase = true,
                RequireUppercase = true,
            };

            // Configure user lockout defaults
            manager.UserLockoutEnabledByDefault = true;
            manager.DefaultAccountLockoutTimeSpan = TimeSpan.FromMinutes(5);
            manager.MaxFailedAccessAttemptsBeforeLockout = 5;

            // Register two factor authentication providers. This application uses Phone and Emails as a step of receiving a code for verifying the user
            // You can write your own provider and plug it in here.
            manager.RegisterTwoFactorProvider("Phone Code", new PhoneNumberTokenProvider<IdentityUser, Guid> {
                MessageFormat = "Your security code is {0}"
            });
            manager.RegisterTwoFactorProvider("Email Code", new EmailTokenProvider<IdentityUser, Guid> {
                Subject = "Security Code",
                BodyFormat = "Your security code is {0}"
            });
            manager.EmailService = new EmailService();
            manager.SmsService = new SmsService();
            var dataProtectionProvider = options.DataProtectionProvider;
            if (dataProtectionProvider != null) {
                manager.UserTokenProvider =
                    new DataProtectorTokenProvider<IdentityUser, Guid>(dataProtectionProvider.Create("ASP.NET Identity"));
            }
            return manager;
        }
    }

    // Configure the application sign-in manager which is used in this application.
    public class ApplicationSignInManager : SignInManager<IdentityUser, Guid> {
        public ApplicationSignInManager(ApplicationUserManager userManager, IAuthenticationManager authenticationManager)
            : base(userManager, authenticationManager) {}

        public override Task<ClaimsIdentity> CreateUserIdentityAsync(IdentityUser user) {
            return user.GenerateUserIdentityAsync((ApplicationUserManager)UserManager);
        }

        public static ApplicationSignInManager Create(IdentityFactoryOptions<ApplicationSignInManager> options, IOwinContext context) {
            return new ApplicationSignInManager(context.GetUserManager<ApplicationUserManager>(), context.Authentication);
        }
    }
}
If you try to compile the project you'll get a few errors. Correct them by go through all lines reported with User.Identity.GetUserId() and change into User.Identity.GetUserIdGeneric<Guid>() (be sure to reference AspNet.Identity.DataAccess to get the GetUserIdGeneric<> extension).
In the file Startup.Auth.cs in the App_Start folder remove app.CreatePerOwinContext(ApplicationDbContext.Create) and replace the OnValidateIndentity with:
  OnValidateIdentity = SecurityStampValidator.OnValidateIdentity<ApplicationUserManager, IdentityUser, Guid>(
  TimeSpan.FromMinutes(30),
  (manager, user) => user.GenerateUserIdentityAsync(manager),
  (id) => new Guid(id.GetUserId()))
Open the web.config and change the connection string to whatever you want and rename it to AspNetIdentity (or set the property DataContext.ConnectionStringName in your code with the connection string name you wish to use). Make sure that the database already is created if using SQL Server or otherwise that you reference the correct packages if using another database provider (such as SQLite, MySql etc).
  <connectionStrings>
    <add name="AspNetIdentity" connectionString="Integrated Security=SSPI;Persist Security Info=False;Initial Catalog=MyDatabase;Data Source=(localdb)\v11.0" providerName="System.Data.SqlClient" />
  </connectionStrings>
That's it. Time to compile and run the project. The database should be updated with the identity tables and you should be able to register and login.